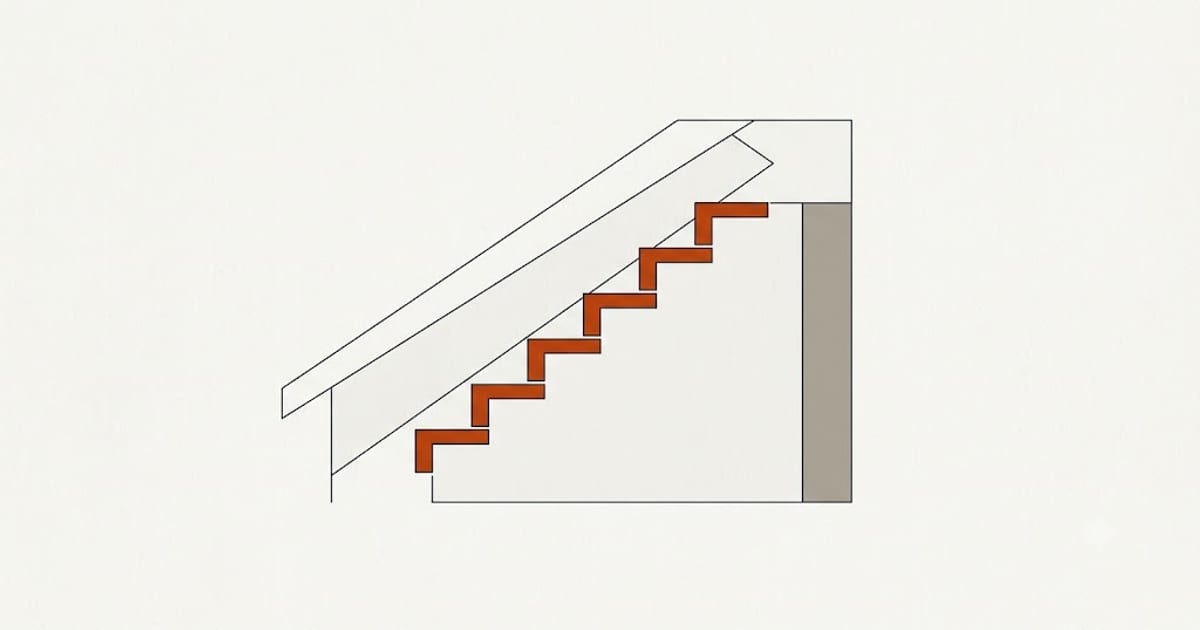
Where a roof plane runs into a vertical wall — a dormer cheek, a chimney side, a two-storey wall above a porch — the junction is flashed with step flashing: one L-shaped piece per shingle course, each lapped over the one below.
The count follows directly from the shingle exposure.
The arithmetic
Pieces = wall length ÷ shingle exposure
Exposure is the amount of each shingle course left showing, and it is not the shingle height:
| Shingle | Exposure |
|---|---|
| Standard three-tab | 5" |
| Most architectural (GAF, Owens Corning, CertainTeed) | 5⅝" |
| Some heavyweight laminates | 5¾"–6" |
Check the wrapper. A 5" versus 5⅝" assumption changes the count by 12%.
Worked example — a 16 ft dormer sidewall, architectural shingles at 5⅝":
- 16 ft = 192 inches
- 192 ÷ 5.625 = 34.1
- 35 pieces, plus two or three spare for the kick-out and the top
Piece sizes
Step flashing is sold pre-bent in standard sizes:
| Size | Where |
|---|---|
| 4" × 4" × 8" | The common default — 4 up the wall, 4 on the roof, 8 long |
| 5" × 7" | Longer leg up the wall, better under stucco or where the siding sits high |
| 6" × 8" | Steep pitch, heavy weather exposure |
The 8 inch length is what makes the lap work: each piece covers the one below by roughly the difference between its length and the exposure — about 2⅜ inches on a 5⅝ inch exposure. Shorter pieces on a coarse exposure leave the lap too tight.
Why continuous flashing is the wrong answer
The tempting alternative is one long bent length of metal running the whole junction. It is faster, it uses one piece instead of thirty-five, and it fails.
Water that gets under a shingle course runs down the roof plane. With step flashing it meets a piece of metal that carries it out on top of the shingle below, and it keeps going down the roof. With a continuous length, that water is behind the metal for the entire run, with nowhere to come out until the bottom — and the bottom is usually where the wall meets a roof edge, a gutter or another wall.
Continuous flashing is correct at a headwall, where the roof stops and the wall carries on above it, because there is no water travelling down alongside it. It is wrong at a sidewall, where the roof runs up beside the wall.
The kick-out
The last piece at the bottom of a sidewall must be a kick-out flashing — a step piece with the lower end bent out to throw water into the gutter instead of behind the fascia.
This piece is missing on an enormous number of houses, and its absence produces a very specific failure: a vertical strip of rotten sheathing behind the siding at the bottom of a dormer, with a dry roof above it. If you are re-roofing and the sidewall has no kick-out, add one. It costs a few dollars.
What to order
For a 16 ft sidewall on architectural shingles:
- 35 pieces of 4 × 4 × 8 step flashing
- 1 kick-out flashing
- Nails into the wall sheathing only, never through the roof leg
Step flashing is nailed on the wall side. A nail through the roof leg puts a hole in the flashing where water runs, which is the one place on the whole roof you cannot put a hole.
Chimneys are step flashing plus a second layer
A chimney sidewall is flashed the same way — one step piece per course — but masonry cannot take a nailed flashing leg the way sheathing can. The vertical leg is covered by a second piece, counter-flashing, let into a saw-cut groove in the mortar joint.
| Chimney side | Flashing |
|---|---|
| Sides | Step flashing + counter-flashing |
| Front (downhill) | Apron flashing, one piece |
| Back (uphill) | Cricket or saddle, plus back-pan |
The back of a chimney is where roofs leak. Water running down the plane hits the masonry and stops, and on any chimney wider than about 30 inches the IRC requires a cricket — a small ridged structure that splits the flow around both sides.
A back-pan with no cricket on a wide chimney holds water against the masonry for the life of the roof. If a chimney has a rotten deck behind it, the missing cricket is the reason, and simply re-flashing it will produce the same failure again.
Counting a full dormer
A dormer has two sidewalls and a front wall, and the counts differ:
- Two sidewalls — step flashing, one per course each, so double the single-wall count
- Front wall below the dormer window — apron flashing, a single bent length
- Two kick-outs — one at the bottom of each sidewall
For a dormer with 10 ft sidewalls on 5⅝" architectural shingles:
- 10 ft = 120 in ÷ 5.625 = 21.3 → 22 pieces per side, 44 total
- Plus 4 spare, 1 apron, 2 kick-outs
What to check on an existing roof
You can inspect most of this from a ladder at the eave without walking the roof:
- Is there a kick-out at the bottom of each sidewall? Look for a small flared piece of metal aiming into the gutter.
- Does the counter-flashing sit in a groove in the mortar, or is it surface-sealed with caulk? Caulk is a five-year detail on a fifty-year chimney.
- Is there a cricket behind any chimney wider than 30 inches?
Those three cover the great majority of flashing failures on a house that otherwise has a sound roof.